

Data Recovery using Hex Editor
What’s good?
In this post we’ll see how to do data recovery using a hex editor.
If you used a data recovery program in the past you might have asked yourself: how do they work?
That is exactly what we’ll be covering on this post. I’m sure by the end of it you’ll have a broader understanding of what files look like in terms of raw bytes and how to identify them in a drive.
Let’s jump into it! 😉
In a previous blog post, I’ve showed how you can use Recuva to recover data from a disk.
This time we’ll dive into the exact functions that program is taking in order to retrieve that data (whether its pictures, videos, documents, whatever) from a corrupted or formatted drive.
Be warned: while not incredibly complex, this is a deep dive into how files look like as raw bytes and might scare off complete beginners; although, following the guide can still be relatively simple.
Let’s start by getting the right software.
Hex Editor Software
Here’s my recommended hex editors for both Windows and Linux:
- Windows: HxD (free)
- Linux: Bless hex editor
Alternatively, you can download a hex editor plugin for Notepad++, Sublime or similar text editor.
Once you have a hex editor in place, we’re ready to begin!
Understanding a Hex Editor
Let’s start off by understanding the interface of a hex editor:
At the top you have the standard toolbar to open a file, create a new file, open a disk and so on…
The main interface will usually present three panels:
- Offset (binary): This will contain the binary addresses for the hexadecimal content.
- Hex content: The hexadecimal content for that specific binary address.
- Decoded text: Translated hexadecimal content in ASCII for easier reading.
You should also know that most hex editors will have classic functions to edit a file, search for specific hexadecimal characters and change different settings for specific architectures.
Hexadecimal File Signatures
A file signature is a sequence of hexadecimal bytes that identify the beginning of a file. For the most part, every file type will have a hex sequence that identifies it, be it an image, a document, a video, etc.
You can find a list of file signatures here.
Based on these file signatures, we can now open a file in a hex editor and find out what it is…
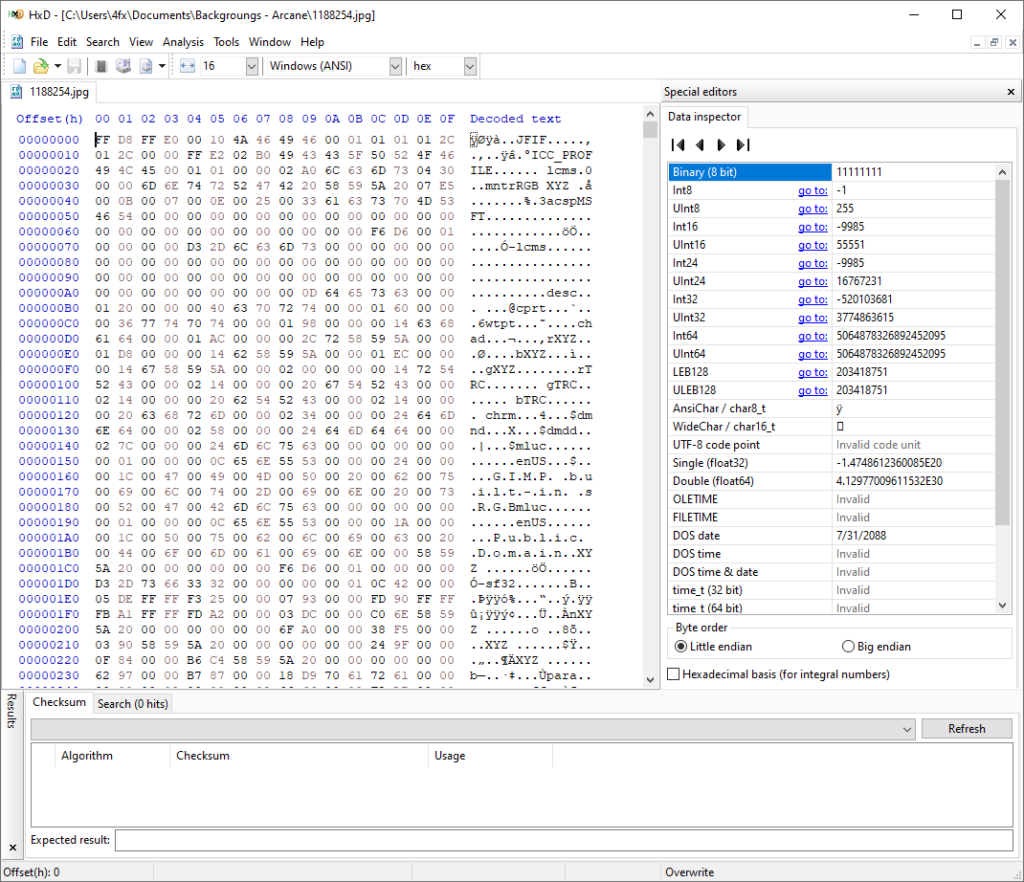
In the image above you can see we have a JPG open that starts with the file signature:
FF D8 FF E0 00 10 4A 46Even if the image didn’t have an extension, we could now simply match the starting file signature and find out what type of file it is. Now how do we identify the end of the image?
One way is to do it by yourself. You know how the hex editor works at this point, so you can easily just open a file of the specific type you are looking for and check the end of file signature.
Let’s take a look at the hex content for a JPG file:
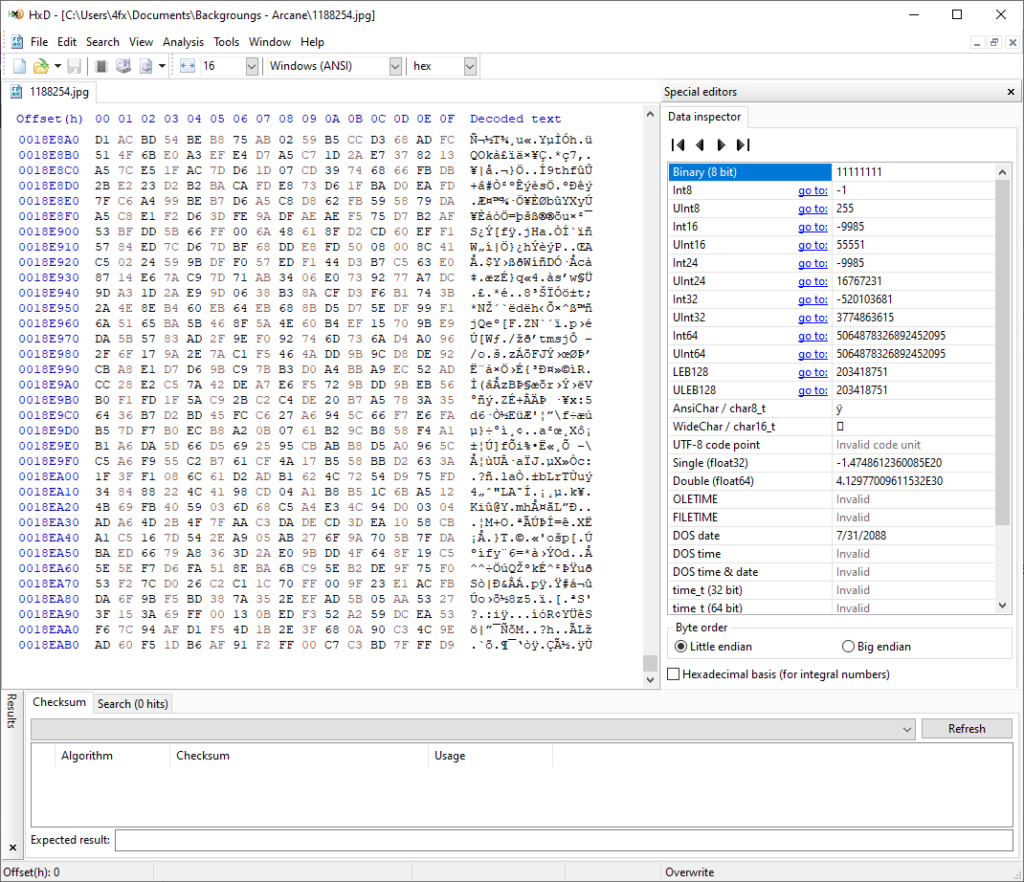
You’ll notice the end of image signature is:
FF D9Now the best way to learn more is to investigate more files of the same type, in this case, JPG and verify that they all have the same starting file signature and end of file signature as well.
We can use this knowledge to recover data from disks by using a hex editor! 😉
Data Recovery using File Signatures
You can now open a disk (whether its a USB, hard drive, etc.) using a hex editor. That will bring up the entire content of that disk in hexadecimal on the main interface.
From the top toolbar, hit “Search”, then select “Hex-values” and search for the file signature:
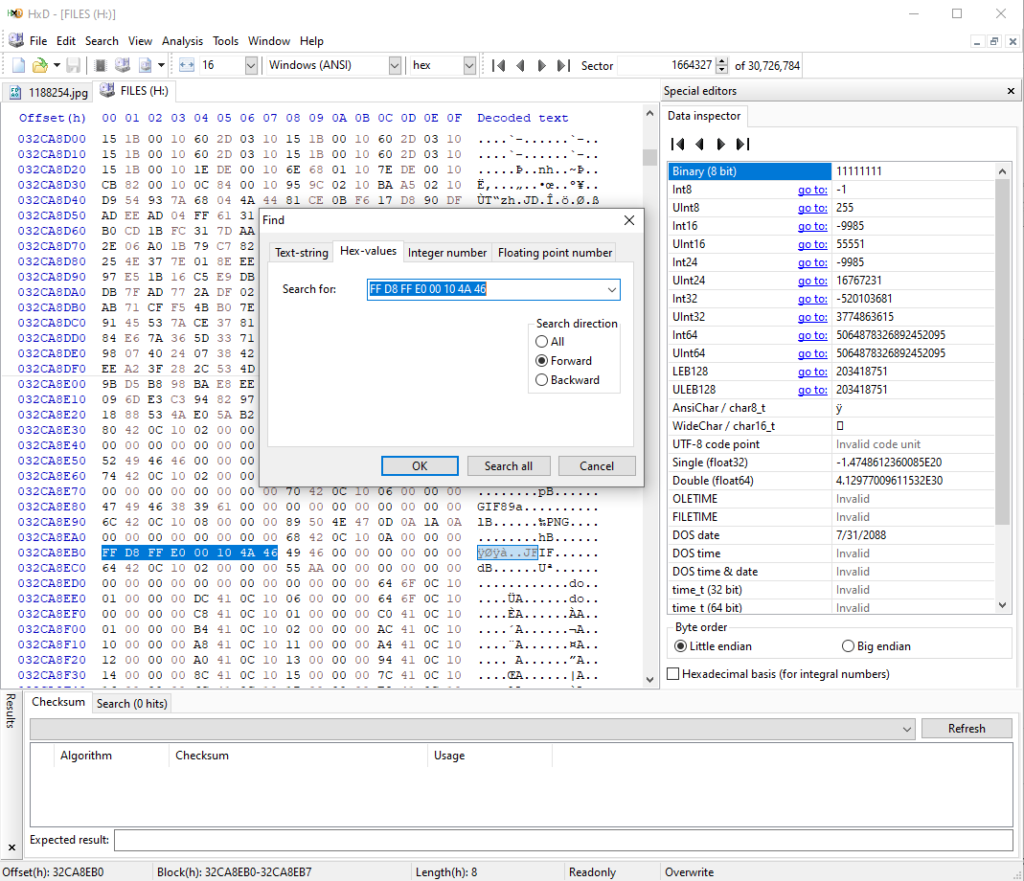
Once you locate the file signature you’ll know that’s the offset where a JPG image begins.
Now you can go ahead and copy that binary offset, in the above image it would be:
032CA8EB0Then run another search for the hex-values of the end of image signature: FF D9
That’ll give you the offset of where that image ends. We can now select that entire content by right-clicking on the offset and choose “Select block”. Then enter the starting offset and end offset:
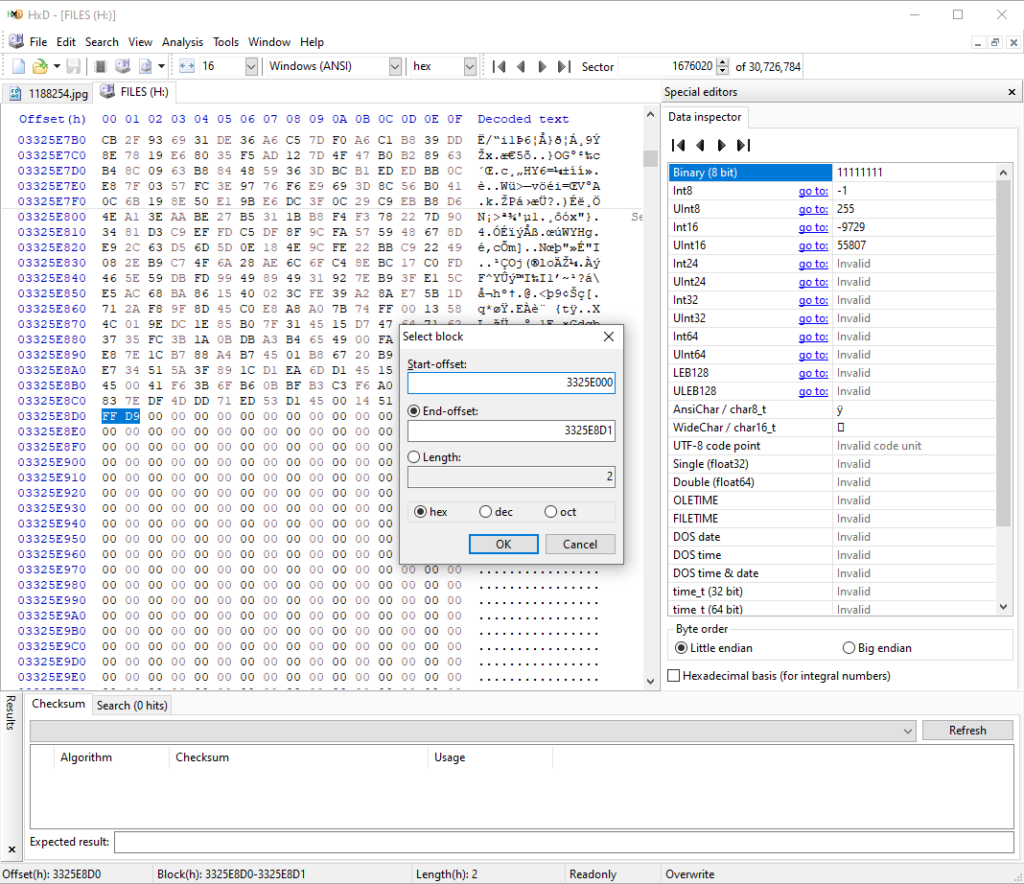
Now it’s just a matter of copying the hex content to the clipboard, click on “New file” and paste the content into a new file. Save it as a JPG and you will have recovered an image.
For more insight, check out the video at the beginning of the post.
Hope you enjoyed this one, see ya next time! 😉


wow, that was a great tuturial, thanks.
how can I use the same method on android phone with inner memory not the sdcard?